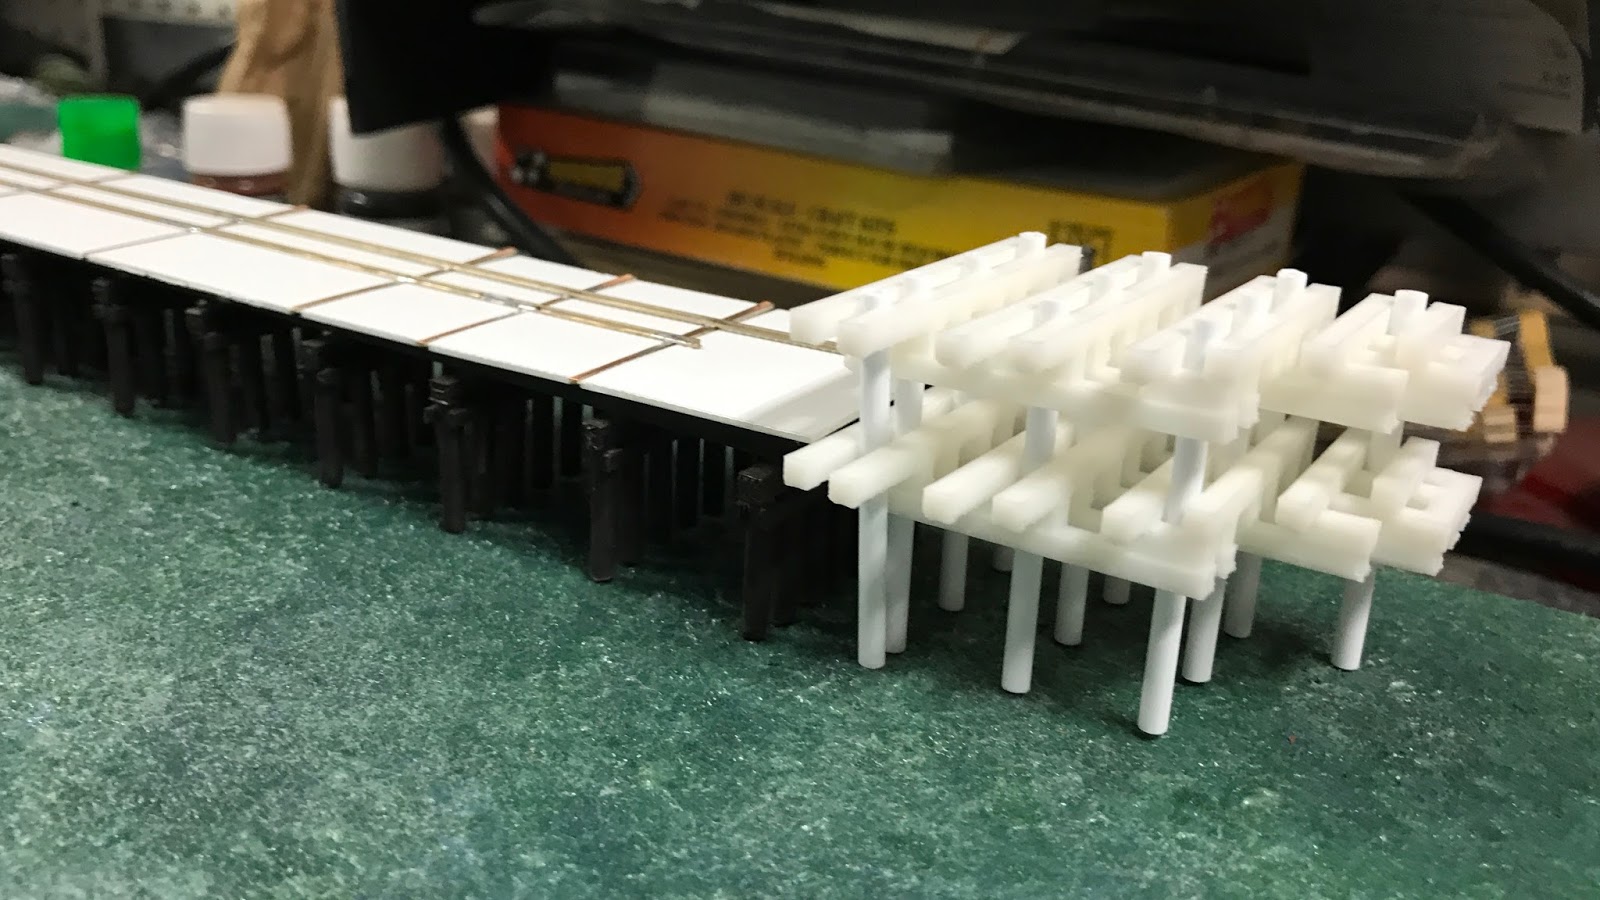
Pier prints look good, added some "pilings" and now I need to do more adjusting before glue and paint.
July 20, 2017
July 19, 2017
More 3D Printing Updates
Had some good success with the "subset" print. Did some checking against the in-progress pier and also checked the fit of the plastic piling (the outer pilings will be "real" wood).
Also considering adding some NBW castings to the print— the feature size of the inexpensive monoprice printer didn't really support adding them to the model.
I may choose to make some size adjustments, but things look great so far.
Also considering adding some NBW castings to the print— the feature size of the inexpensive monoprice printer didn't really support adding them to the model.
July 18, 2017
Better luck with 3D printing
At the encouragement of a friend, I made some attempts at 3D printing the pier end. I'm actually pretty happy with the results.
Unfortunately, I got the scaling incorrect (saved the STL in "inches", but Cura expected "mm"). This led to a smaller than expected print— but the job still took over TEN hours to print. There are still globs of PVA (think glue stick) support that I need to soak/scrub away that are visible here, as the support structure is printed using a secondary extruder head.
The idea here was to "automate" the construction of the the layers of the pier end, but still use plastic tubing for the piers. This print exactly matched the CAD dimensions, which is awesome— but this may need "shrinking" to match up to the model I've been building.
First prototype
Using a friend's Ultimaker 3, I made an "all up" attempt at printing the entire assembly in one pass.Unfortunately, I got the scaling incorrect (saved the STL in "inches", but Cura expected "mm"). This led to a smaller than expected print— but the job still took over TEN hours to print. There are still globs of PVA (think glue stick) support that I need to soak/scrub away that are visible here, as the support structure is printed using a secondary extruder head.
Second Attempt
In parallel effort, I sent a subset of the design to a friend who has a Monoprice Select Mini 3D:The idea here was to "automate" the construction of the the layers of the pier end, but still use plastic tubing for the piers. This print exactly matched the CAD dimensions, which is awesome— but this may need "shrinking" to match up to the model I've been building.
July 16, 2017
More Pier CAD
Fun with TurboCAD yielded the next pass at the pier end. I omitted the set of outer pilings, as I want to fabricate those with wooden dowels:
July 14, 2017
schmallspurbahn
Got a chance to head to Switzerland last week, couldn't resist taking a picture of this little meter gauge switching engine.
June 23, 2017
End of the pier
Ok, so gluing up railings was inspiring... so I decided to take another look at something which froze me dead in my tracks.
That cool drone footage showed me that the end of the ferry slip wasn't just a simple set of pilings lashed together:
Spent some time scrubbing back and forth on the video, and found that my friend managed to capture a full overhead view:
Probably going to check and see if Archer Transfers rivets can be used to model the topside bolts (http://www.archertransfers.com/AR88053.html?). I think I'll used HO Scale NBW castings for those side bolts.
I've started making more 3D CAD to enable me to carefully cut and glue more plastic together:
June 17, 2017
June 16, 2017
3D Printing "Fun"
So, first set of tests with the Utilimaker 3 reminded me I have a lot to learn. My first attempt was printed with a raft, which pretty much obscured all the detail of the side rails. The result reminded me of a melted mess:
At lunch today, my friend with a Form1 SLA printer said to send him the STL file for him to try. We'll see how that comes out.
As a backup, I took a side trip the Train Shop on the way back home to pick up Evergreen styrene, Tamiya Thin Cement, and an NWSL Chopper III.
I also noticed that the upper "ledge" of the detail was also lost. I tried printing without the rafts & supports (I removed the risers), but didn't have much more luck.
Unfortunately, while the top print looks correct, it is HO not N. The feature size of the N version were too small to be replicated on the Z axis of the printer. You can probably see the remnants of a smeared layer on the top edge of the N Scale print.
At lunch today, my friend with a Form1 SLA printer said to send him the STL file for him to try. We'll see how that comes out.
As a backup, I took a side trip the Train Shop on the way back home to pick up Evergreen styrene, Tamiya Thin Cement, and an NWSL Chopper III.
June 15, 2017
June 14, 2017
Shelf Layout Progress
I managed to acquire some Atlas Code 55 turnouts, which enabled a quick check of fit issues over the weekend. On the good news front, the extra lead before the points on the Atlas #5s elongated some leads by an extra half car-length. Failing to account for the switch stand and head blocks, I had to tweak the location of the Santa Fe lead. I can almost smell the plywood.
Subscribe to:
Posts (Atom)